Understanding Epoxy in Kitchen Floors: Practical Guide
Imagine dropping a heavy cast-iron pot directly onto your kitchen floor. On traditional ceramic tile, the impact shatters the glaze and cracks the substrate. On a commercial-grade epoxy system, the pot simply bounces.
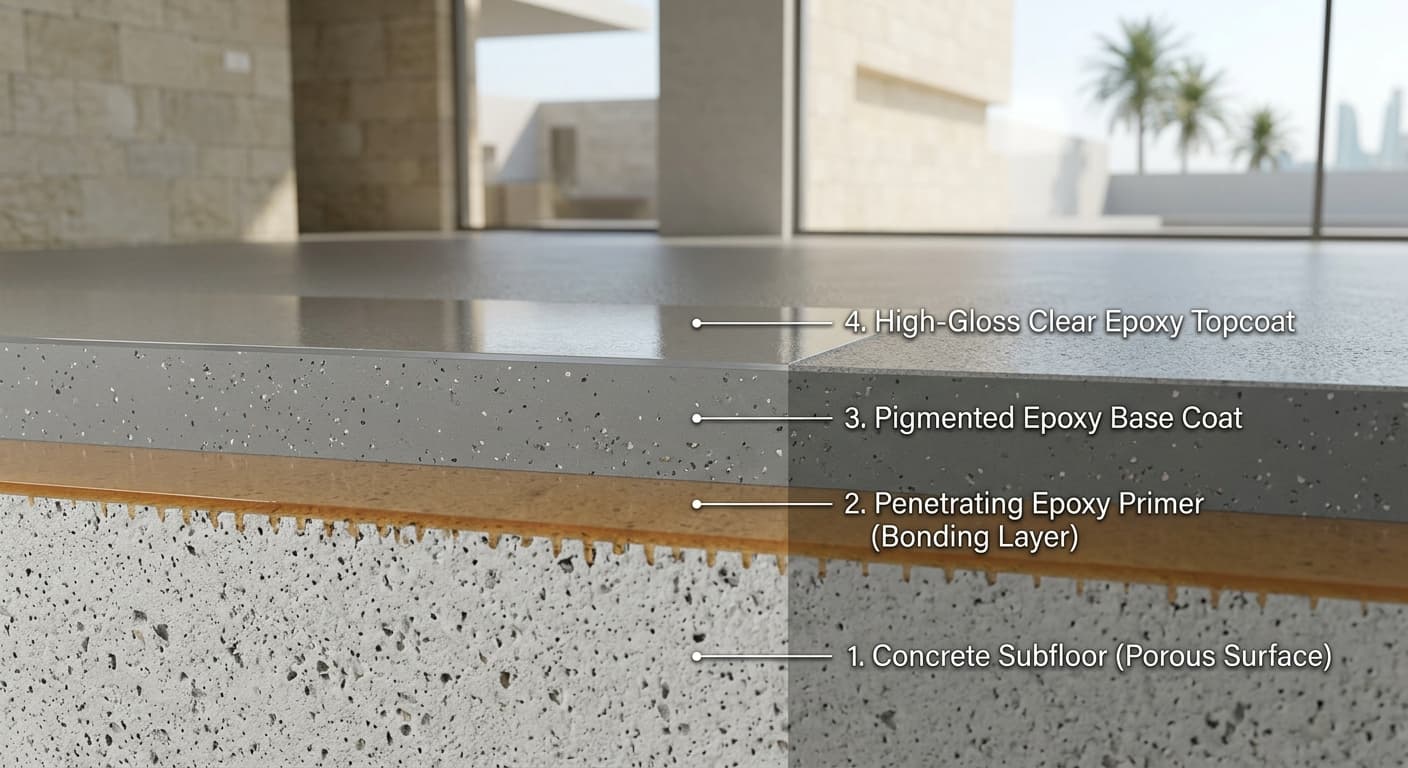
Epoxy is a two-part thermosetting resin that chemically reacts to form a seamless, impenetrable solid layer directly over your existing subfloor. Homeowners and restaurant operators search for epoxy in kitchen environments when they are tired of scrubbing turmeric stains out of porous grout lines or replacing cracked tiles.
The failure point happens when buyers confuse structural epoxy with cheap DIY floor paints. This confusion leads to catastrophic peeling, especially in Bahrain's intense summer humidity. Understanding the chemical bonding process changes how you evaluate flooring quotes, preventing you from wasting money on temporary fixes.
What Epoxy Actually Means for High-Traffic Cooking Spaces
True epoxy is not a paint that dries by evaporation. It is a structural layer created through a precise chemical reaction, fundamentally altering the physical properties of your floor.
The Resin and Hardener Chemical Cross-Linking Process
When you mix epoxy resin with its hardener, you trigger a process called cross-linking. The molecules bond together into a rigid, three-dimensional plastic matrix.
If a contractor misses the precise mixing ratio by even 2%, the cross-linking fails. The resulting floor will remain permanently tacky, acting like flypaper for dust and debris, requiring a complete and costly mechanical removal.
Creating a Seamless Barrier Against Cooking Oils and Spices
Traditional kitchen floors rely on grout, which is highly porous. When you spill hot cooking oils or heavily pigmented spices like saffron and turmeric, the grout absorbs the liquid deep into its matrix.
Because cross-linked epoxy is entirely non-porous, these liquids sit on the surface indefinitely. You wipe them away without leaving a shadow of a stain. However, this non-porous nature means any liquid left on the surface creates an immediate slip hazard if not properly textured.
Why Application Thickness (2mm vs 5mm) Dictates Lifespan
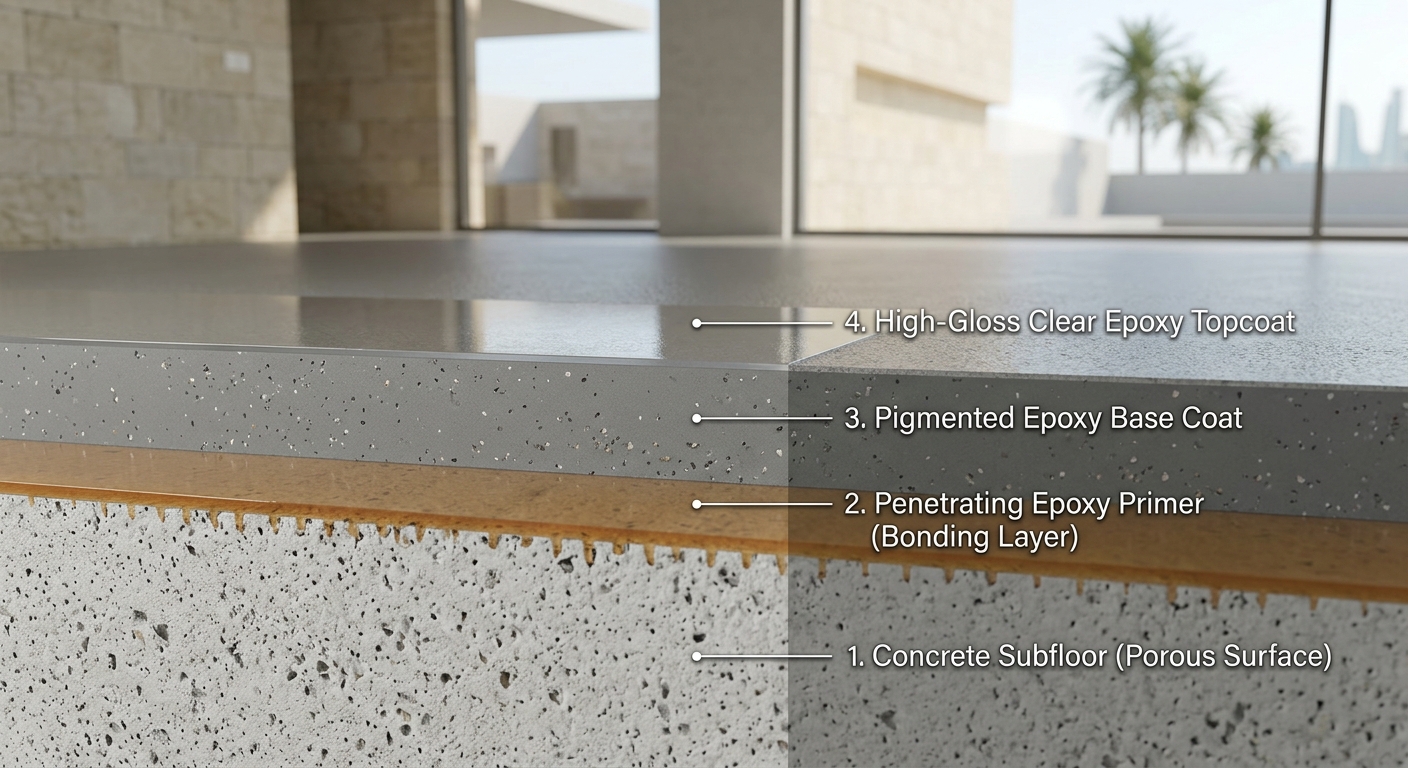
Contractors manipulate quotes by changing the thickness of the pour. A 2mm application acts as a thin skin; it will show every crack and divot in the concrete beneath it and can chip under heavy point loads like dropped appliances.
A 5mm application self-levels, hiding subfloor imperfections and absorbing heavy impacts.
- When 2mm makes sense: Light residential use where the existing concrete is perfectly smooth and budget is the primary constraint.
- When 5mm makes sense: Busy family kitchens, commercial prep areas, or over damaged subfloors.
- The Tradeoff: You pay double for the materials on a 5mm pour, but the floor will last 20 years instead of 5.
How the Curing Process Bonds to Your Floor
Epoxy does not stick to floors naturally. It requires aggressive mechanical preparation and specific environmental conditions to bond permanently.
Diamond Grinding the Subfloor for Mechanical Adhesion
You cannot pour epoxy over smooth concrete or glazed tiles. The substrate must be mechanically profiled using heavy diamond grinders to expose the pores of the concrete, creating a texture similar to 60-grit sandpaper (known as CSP 2 or 3).
If a contractor tells you they can just "acid wash" the concrete or lightly sand the existing tiles before pouring, reject the quote. Without a deep mechanical profile, the epoxy has nothing to bite into and will peel up the first time you drag a heavy refrigerator across it.
The Exothermic Reaction During the Initial Pour
The chemical reaction between the resin and hardener generates intense heat, known as an exothermic reaction. In a hot environment, this heat accelerates the curing process dramatically.
In an un-air-conditioned Bahrain kitchen in August, a bucket of mixed epoxy might see its "pot life" (working time) drop from 45 minutes to just 15 minutes. If the installation team is too small or inexperienced, the epoxy will begin hardening in the bucket, resulting in uneven, lumpy floors that cannot be fixed without grinding them down and starting over.
Managing Curing Timelines in Bahrain's 80%+ Humidity
High humidity disrupts the surface cure of epoxy. When moisture in the air settles on curing epoxy, it causes "blushing"—a cloudy, greasy, and structurally weak film on the surface.
To prevent this, the kitchen must be climate-controlled during the 24-48 hour curing window. If your AC is not functioning during a renovation, you must delay the epoxy installation or force the contractor to bring in industrial dehumidifiers.
Common Misconceptions About Epoxy in Kitchen Environments
Misunderstanding the materials leads to poor investments and floors that look terrible within a year of installation.
The Costly 'Epoxy Paint' vs '100% Solids Epoxy' Trap
Hardware stores sell "1-part epoxy paints." These are essentially standard latex paints with a tiny amount of epoxy resin added. They contain up to 50% water or solvents that evaporate, leaving a microscopic 0.1mm film on your floor.
A "100% solids epoxy" contains no evaporating liquids. If you pour it 3mm thick, it cures exactly 3mm thick. Relying on epoxy paint for a kitchen means you will be repainting in six months when chair legs scratch the finish down to the bare concrete.
The Myth of the Extremely Slippery Surface When Wet
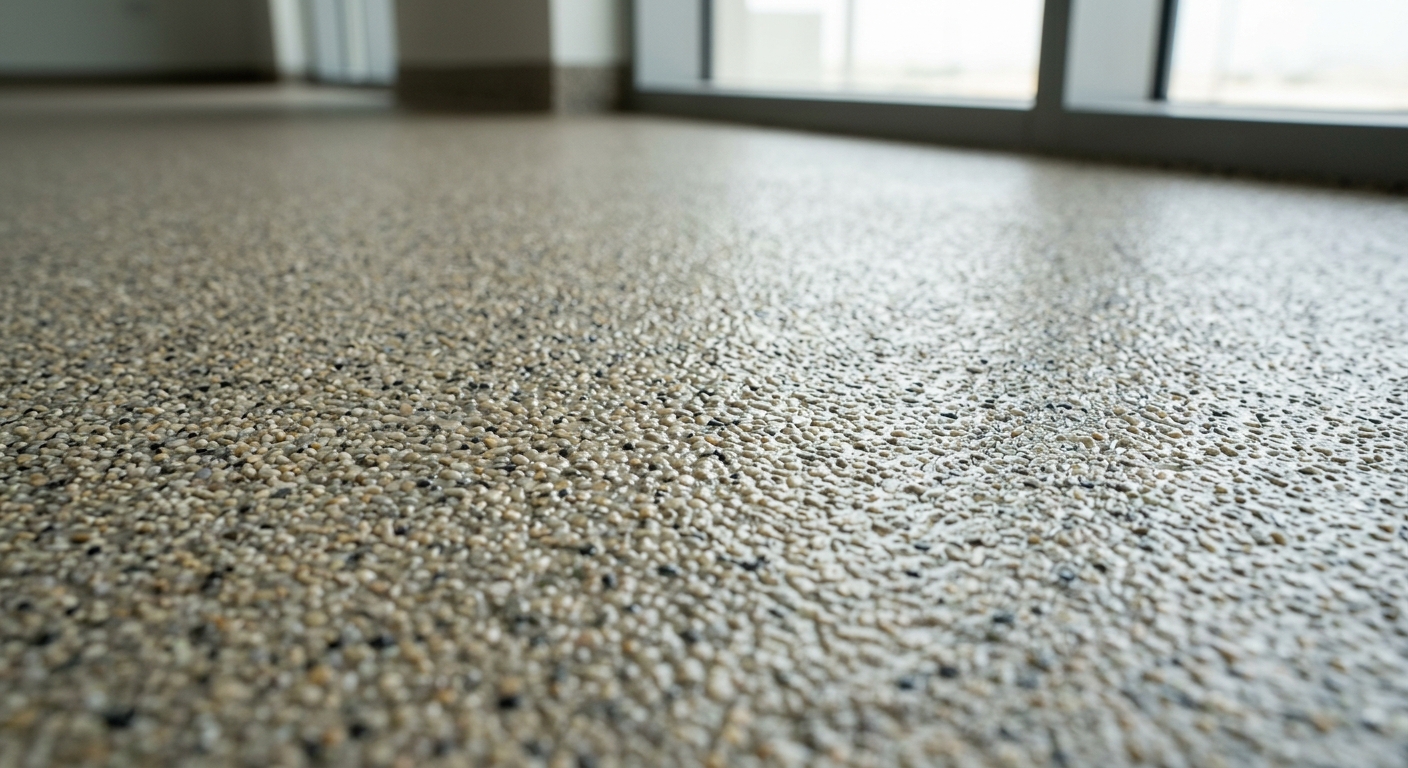
Smooth epoxy is dangerously slippery when wet. Contractors solve this by broadcasting aggregates—like aluminum oxide or colored quartz sand—into the wet topcoat to create traction.
- The Mistake: Requesting maximum slip resistance (rough grit).
- The Consequence: A highly aggressive texture will physically shred string mops and trap dirt, making daily cleaning impossible.
- The Solution: Specify a medium 40-mesh grit. It provides enough traction to prevent falls when water spills near the sink, but remains smooth enough to clean with a standard microfiber mop.
Assuming UV Resistance Without a Polyurethane Topcoat
Standard epoxy has terrible UV stability. If your kitchen has large windows that let in direct sunlight, an unprotected epoxy floor will turn a sickly yellow color within 18 months.
To prevent this, the epoxy base must be capped with a clear aliphatic polyurethane or polyaspartic topcoat. If a contractor's quote does not explicitly list a UV-stable topcoat, they are cutting corners. You save money upfront, but sacrifice the entire aesthetic of the room.
Why Understanding Epoxy Matters for Your Renovation Budget
Translating these chemical realities into financial decisions protects you from predatory pricing and operational failures.
Calculating Total Installation Costs (BD 15 to BD 35 per sqm)
In the Bahrain market, legitimate epoxy installations range from BD 15 to BD 35 per square meter, depending on the system and condition of your subfloor.
At BD 15 per sqm, expect a basic solid color with standard diamond grinding. At BD 35 per sqm, you are paying for premium flake systems or metallic finishes, complete with moisture vapor barriers and polyaspartic topcoats. If a contractor quotes you BD 8 per sqm, they are either using water-based paint or skipping the diamond grinding process entirely. Both guarantee failure.
Evaluating Subfloor Moisture Tolerance Before Pouring
Concrete acts like a sponge, drawing moisture up from the ground. If the moisture vapor emission rate (MVER) exceeds 3 lbs per 1,000 square feet, the rising vapor pressure will literally blow the cured epoxy off the concrete, creating massive blisters.
Before signing a contract for epoxy in kitchen renovations, demand a calcium chloride moisture test on the bare concrete. If the moisture levels are high, you will need to pay an additional BD 3 to BD 5 per sqm for a specialized moisture vapor barrier primer. Skipping this step in areas with high water tables (like parts of Muharraq or Sanabis) guarantees a ruined floor.
Impact on Daily Cleaning Routines and Long-Term Hygiene
The absence of grout inherently upgrades your kitchen's hygiene, as there are no crevices for bacteria to breed. However, maintaining the glossy finish requires changing your cleaning chemicals.
Harsh, highly alkaline degreasers or acidic cleaners will chemically etch the polyurethane topcoat, leaving dull, cloudy patches. You must switch to pH-neutral floor cleaners. If your household relies on harsh bleach mixtures for daily mopping, an epoxy floor will lose its protective sheen within a year.
Real-World Examples of Epoxy in Kitchen Settings
Different aesthetic systems serve different functional purposes depending on the specific demands of the space.
Seamless Flake Installations in High-Traffic Saar Villas
For busy residential kitchens, contractors broadcast vinyl chips (flakes) into the wet epoxy base coat until the floor is completely covered, then seal it with a clear topcoat.
- When it makes sense: Family homes with pets and children. The dense, randomized pattern of the vinyl flakes perfectly camouflages dust, crumbs, and minor surface scratches between weekly cleanings.
- What you give up: The sleek, minimalist look of a solid color floor.
Commercial-Grade Metallic Epoxy in Busy Manama Restaurants
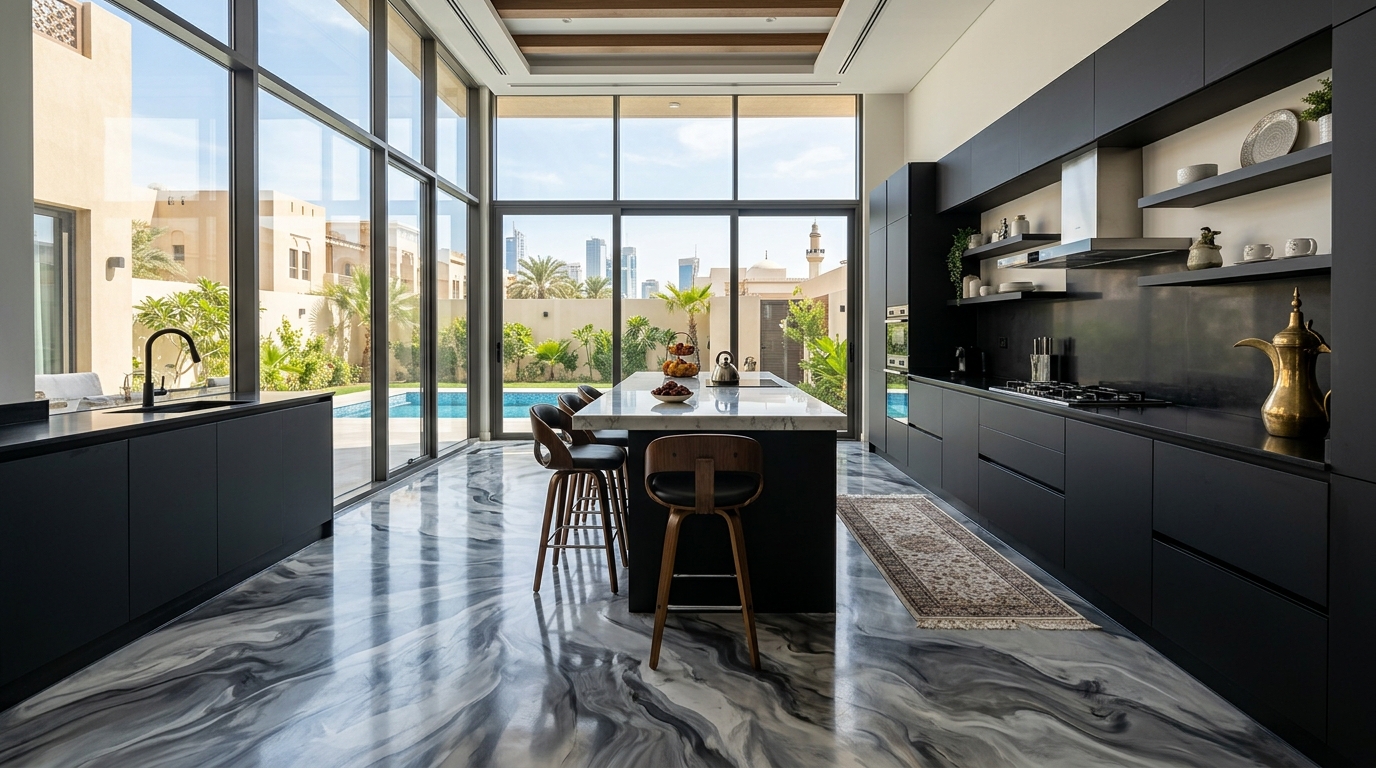
Metallic epoxy uses special metallic pigments mixed into a clear resin, manipulated with rollers and squeegees to look like flowing liquid, marble, or stormy clouds.
- When it makes sense: Open-concept restaurant kitchens or high-end luxury homes where the floor is a primary design feature.
- What you give up: Metallic finishes show surface scratches much faster than flake systems. Dropping a knife or dragging a heavy metal table will leave a visible white scratch in the clear coat, requiring professional buffing and waxing to maintain the illusion of depth.
Integrating Anti-Slip Quartz Broadcasts Near Sink Areas
In commercial prep kitchens, specific zones face higher risks. Water inevitably pools around dishwashing stations and large industrial sinks.
Instead of treating the entire floor with heavy anti-slip aggregate—which makes the whole room harder to mop—smart contractors will broadcast a heavier concentration of colored quartz specifically in a 1.5-meter radius around the sink. This localized approach balances safety in wet zones with cleanability everywhere else.
Conclusion
The true value of using epoxy in kitchen environments lies in its chemical transformation from a liquid resin into a structural, impenetrable shield. It solves the chronic problems of stained grout and cracked tiles, provided you respect the strict requirements of its application.
By recognizing that successful installation relies entirely on aggressive mechanical subfloor grinding and strict moisture management, you can confidently reject cheap "epoxy paints." You now know to demand 100% solids systems capped with UV-stable polyaspartic or polyurethane topcoats.
Before requesting quotes from local Bahraini contractors, evaluate your current subfloor. Ask contractors directly about their diamond grinding equipment, their strategy for managing curing times in high humidity, and whether they perform moisture testing. If they hesitate on any of these points, find another installer.